XDoG-Guided PixelOE: Turn Images into Pixel Art
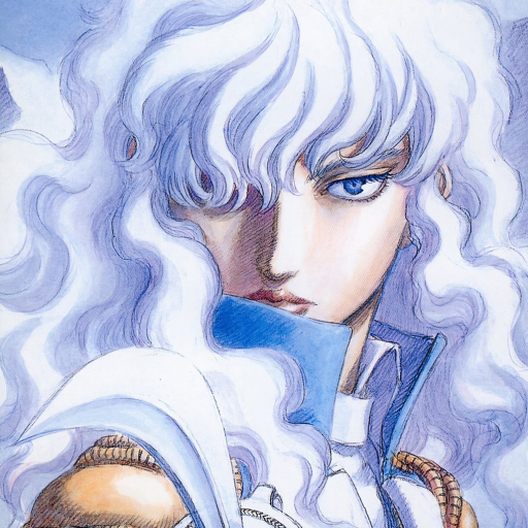
I have been exploring programmatic ways to turn images into pixel art, as a base layer to refine by hand. The result will never match a hand-drawn piece, but it is a useful reference for palette and outline, and good enough for simple cases.
Just scale it down
My first attempt was to shrink the image to 48×48 and then scale it back up to inspect. There are two common ways to shrink:
-
Nearest-neighbor: each cell samples a single point. Points on thin lines often get missed, so lines break apart.
-
Box (average): each cell takes the average color. Lines blend into their surroundings and turn faint.
Thicken the lines first
Lines break or fade when you scale down. The fix is to thicken them before scaling.
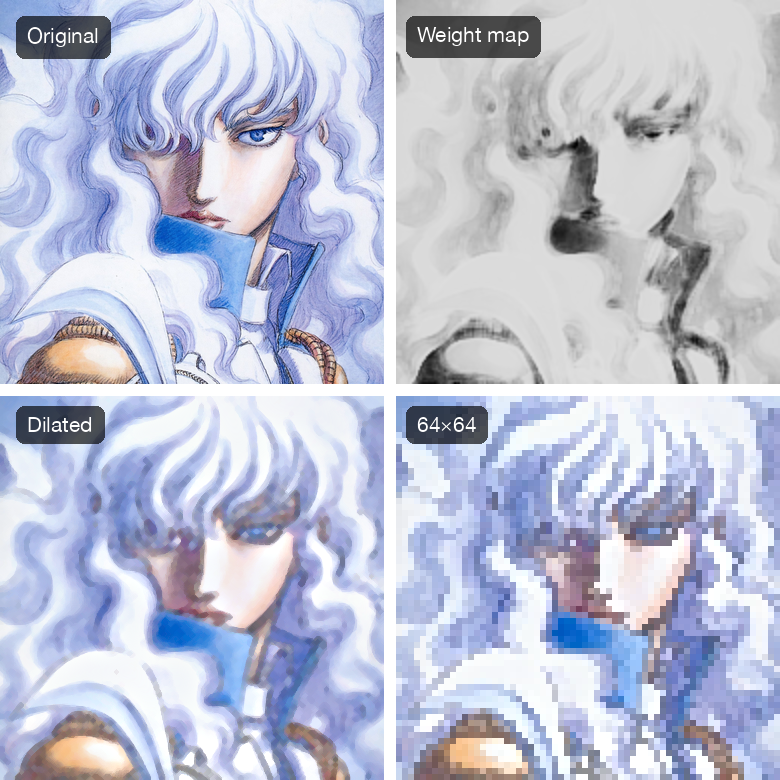
PixelOE does exactly this. It is an open-source pixelation tool by KohakuBlueleaf, in three steps:
-
Compute a weight map from the brightness of each block. Where the map is whiter, dark pixels expand further outward.
-
Map the colors back to the original image.
-
Scale down. Each cell picks one pixel, preferring an unusually dark or bright one.
The problem with thickening
PixelOE only looks at brightness to decide where to expand; it does not know where the lines are. Griffith is a bright image, so most of the weight map is light and dark areas bleed outward nearly everywhere.
Zoom in on the eyes:
-
The eyes collapse into a few pale blue pixels
-
The eyeliner breaks apart
-
The shading beside the face turns a muddy gray-violet
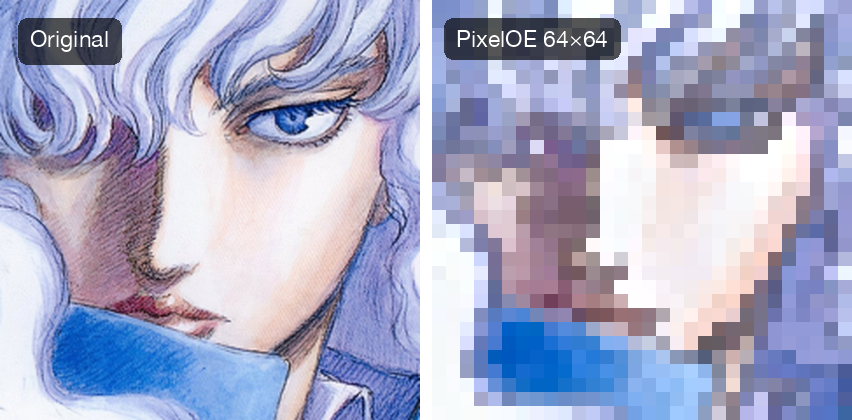
PixelOE needs to know where the lines are.
Feed it a line drawing
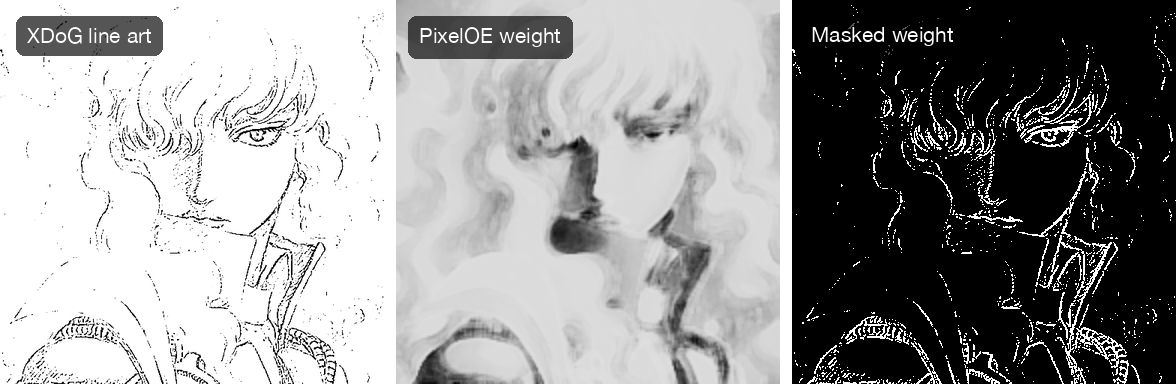
Since PixelOE cannot find the lines itself, I extract a line drawing and hand it over:
-
Extract lines with XDoG. XDoG blurs the image twice, subtracts the two, and thresholds. On this image it takes only a few milliseconds.
-
Turn the line art into a black-and-white mask.
-
Replace the weight map with the mask, so only the dark pixels on the lines expand.
Why XDoG
Besides XDoG, I compared three AI models for line extraction:
- XDoG: a classic image-processing algorithm that blurs twice, subtracts, and thresholds. Runs in milliseconds, no model needed.
- TEED: a lightweight edge-detection Transformer that balances speed and accuracy for real-time use.
- PiDiNet: a pixel-difference convolutional network that applies classic edge-operator ideas inside a CNN, with few parameters.
- Anime2Sketch: a sketch-extraction model trained on anime images, producing the most hand-drawn-looking lines, but the model is 218MB.
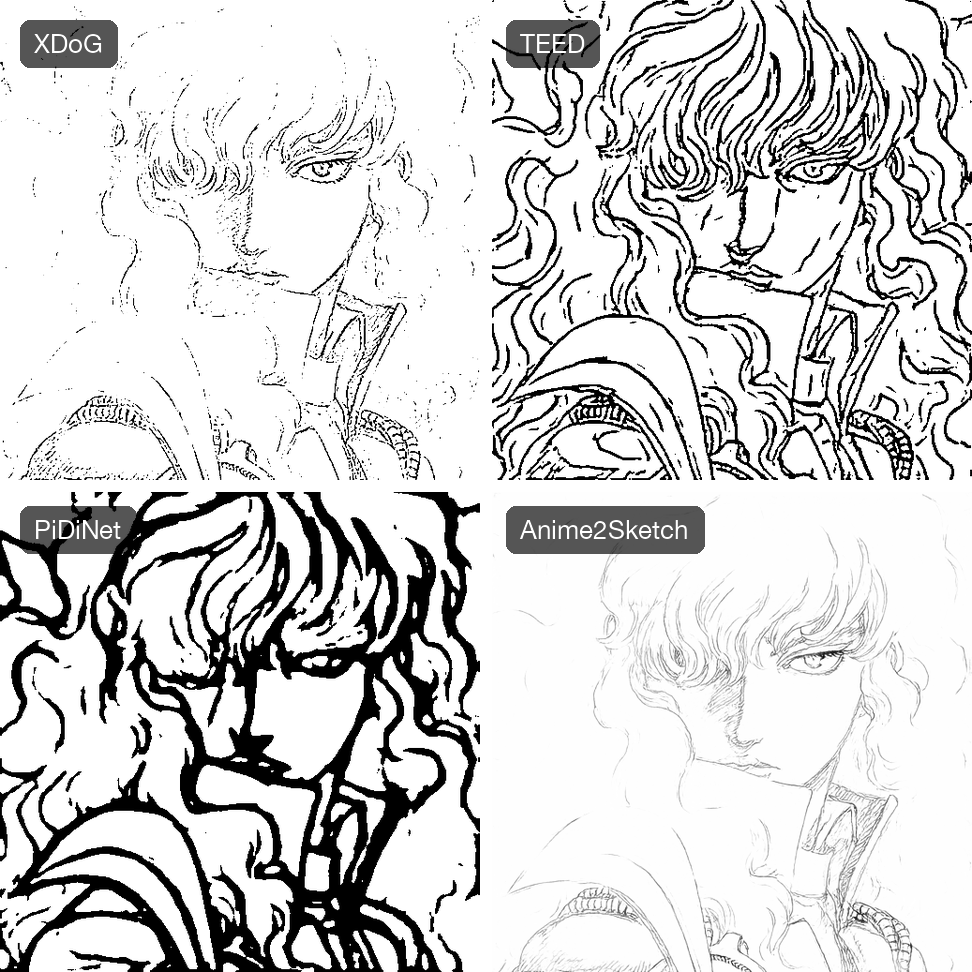
Anime2Sketch produces the closest result to hand-drawn lines, but its model is too large to ship on the web, so I went with XDoG.
64×64 comparison
Next I compare PixelOE's defaults (thickness=2) against the line-art version, starting at 64×64.
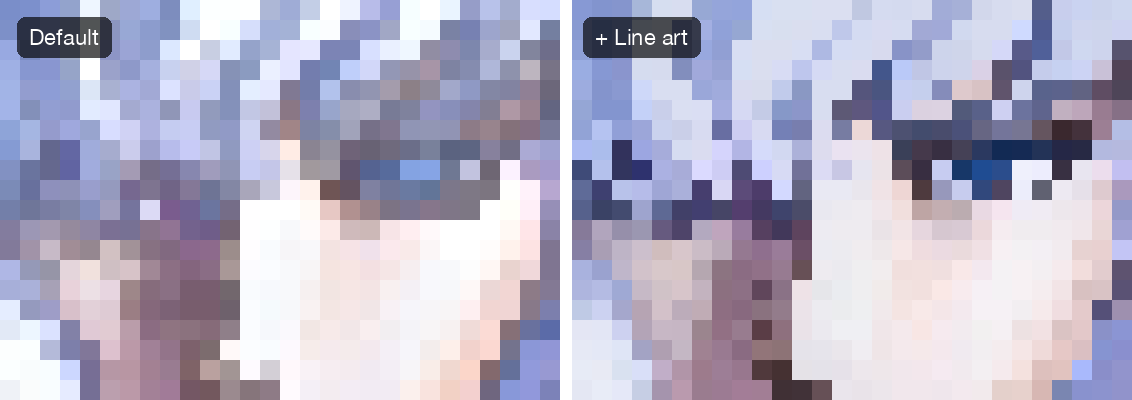
After adding line art:
-
A continuous dark eyeliner appears above the eye
-
The bridge of the nose and the chin read more clearly
-
A few dark strokes appear on the right side of the collar
48×48 comparison
Now scale down to 48×48.
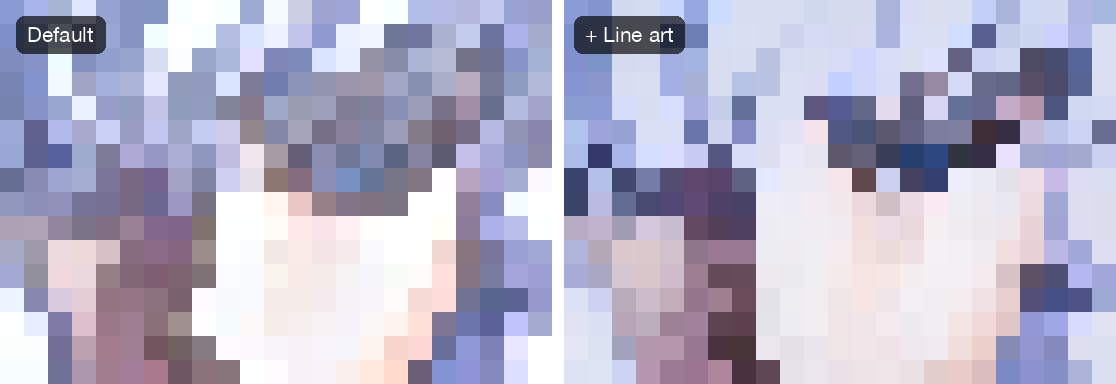
With the default settings the eyes and hair blur into the same color and lose their edge. With line art the eyes are still readable, though the black specks on the clothing are denser than at 64×64.
Smooth first, then shrink?
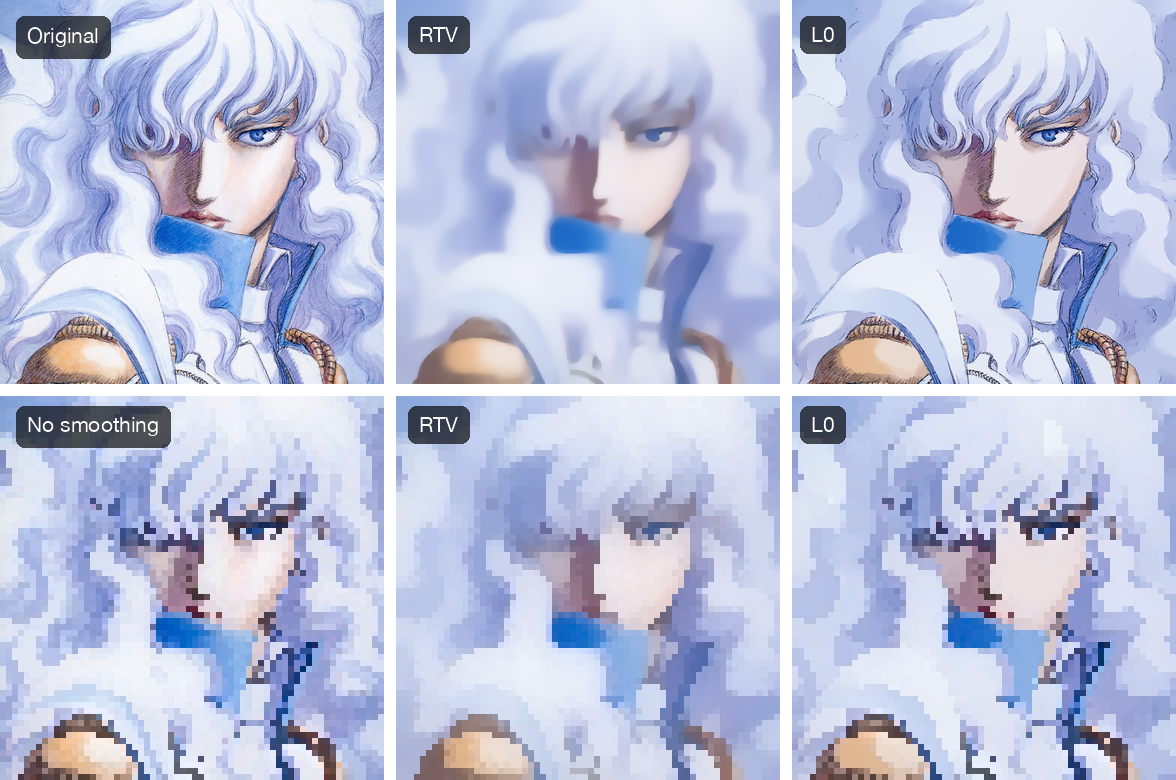
Does smoothing the image before scaling help? Both of these keep large color regions and remove fine texture:
- L0: L0 smoothing, which constrains the number of non-zero gradients, flattening color regions while trying to keep edges.
- RTV: Relative Total Variation, which measures structure and texture separately to erase small texture while keeping large structures.
I decoupled line art from smoothing. The XDoG mask is extracted from the original image and still replaces the weight map, while PixelOE thickens and scales the smoothed image, so smoothing only affects color.
-
RTV removed the dark lines. Thickening can only expand dark pixels that already exist, and with no dark pixels under the mask the eyeliner becomes a flat gray-blue.
-
L0 kept the lines. The hair blocks are a little flatter, and the rest is nearly identical to the unsmoothed version.
Conclusion: whether to smooth first depends on the scene and art style. To stay legible at both larger and smaller sizes, I still recommend XDoG.